Creating & Configuring Servers
This page details the process of creating a new server instance in Super.Human.Installer (SHI) and configuring its various settings.
1. Starting the Process
- Navigate to the main “Servers” page.
- Click the “Create New” button. This opens the “Select Service Type” page (
ServiceTypePage.hx).
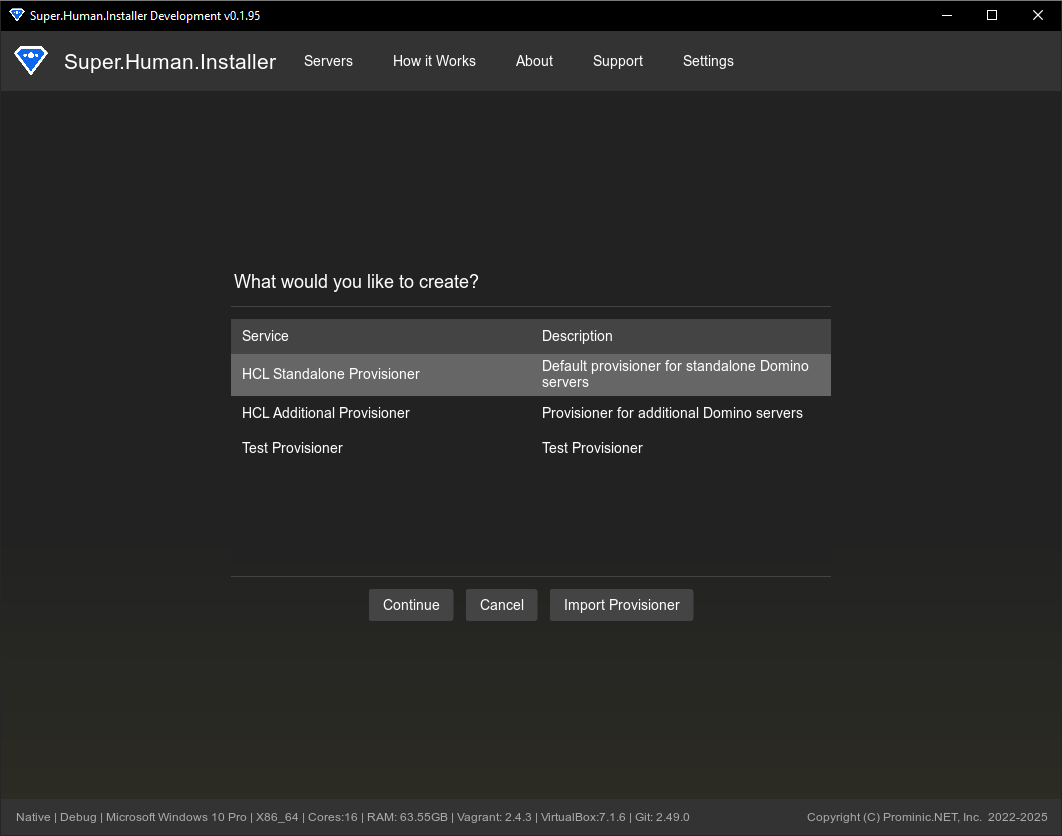
2. Selecting the Service Type
- This page lists all available provisioners (both built-in and imported).
- Each entry shows the provisioner name, description, and type. Invalid or incomplete provisioners might be greyed out.
- Select the desired provisioner type for your new server (e.g., “HCL Domino Standalone Provisioner”, “My Custom Web Server”).
- Click “Configure Server”.
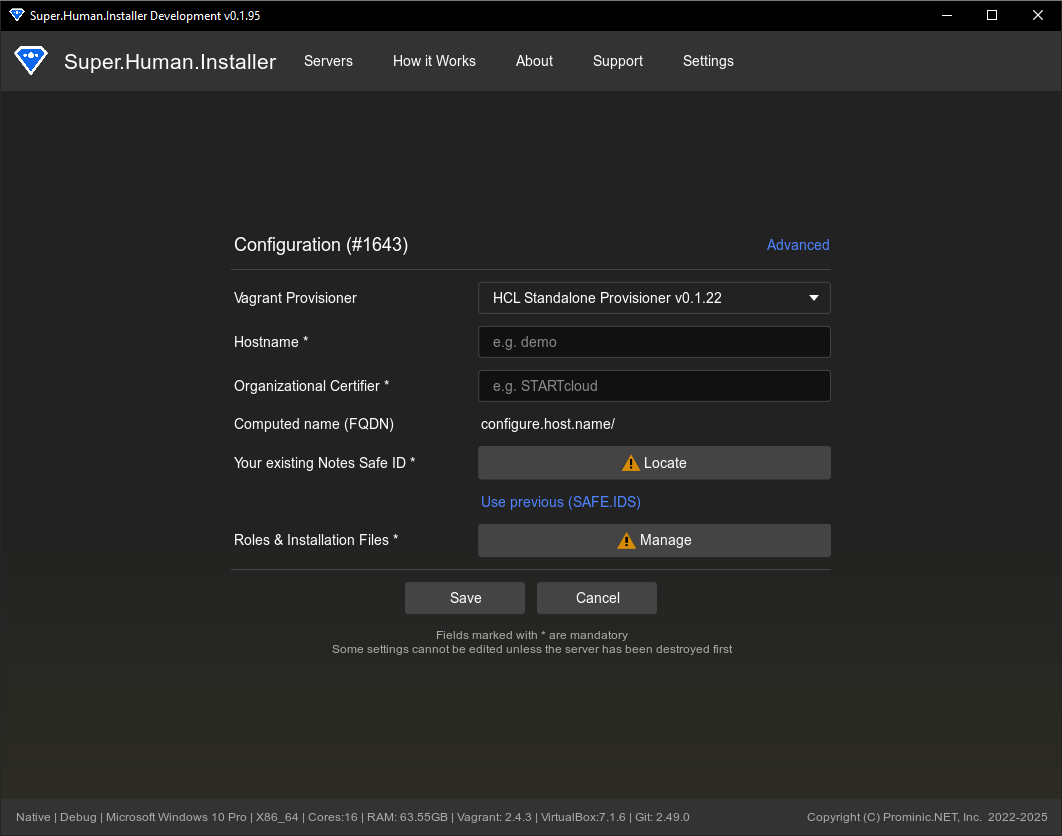
3. Basic Configuration
You will be directed to the appropriate configuration page based on the selected provisioner type:
- Standard Provisioners (Standalone/Default):
ConfigPage.hx - Additional Provisioner:
AdditionalServerPage.hx - Custom Provisioners:
DynamicConfigPage.hx
Fill in the required fields:
- Hostname: A unique name for the server within SHI (e.g.,
devserver1). This is used for the VM name and internal identification. - Domain: Your organization’s domain name (e.g.,
mydomain.local,example.com). SHI combines this with the hostname to create the Fully Qualified Domain Name (FQDN) used within the VM and potentially for network access (e.g.,devserver1.mydomain.local). - Organization: Your organization(
STARTcloud). This is normally associated with provisioners that involve Domino. - Notes Safe ID / Server ID: (Specific to Domino Provisioners) Click “Locate File…” to browse for and select the required Domino ID file (
safe.idfor Standalone,server.idfor Additional). SHI copies this file into the server’s configuration directory for use during provisioning. You can also reuse the last located ID file. - Existing Domino Server Name / IP Address: (Specific to Additional Provisioner) Enter the FQDN and IP address of the primary Domino server this additional server will join.
- Custom Fields: (Specific to Custom Provisioners) The
DynamicConfigPagewill display input fields based on thebasicFieldsdefined in the selected custom provisioner’sprovisioner.ymlmetadata. Fill these out according to the provisioner’s requirements.
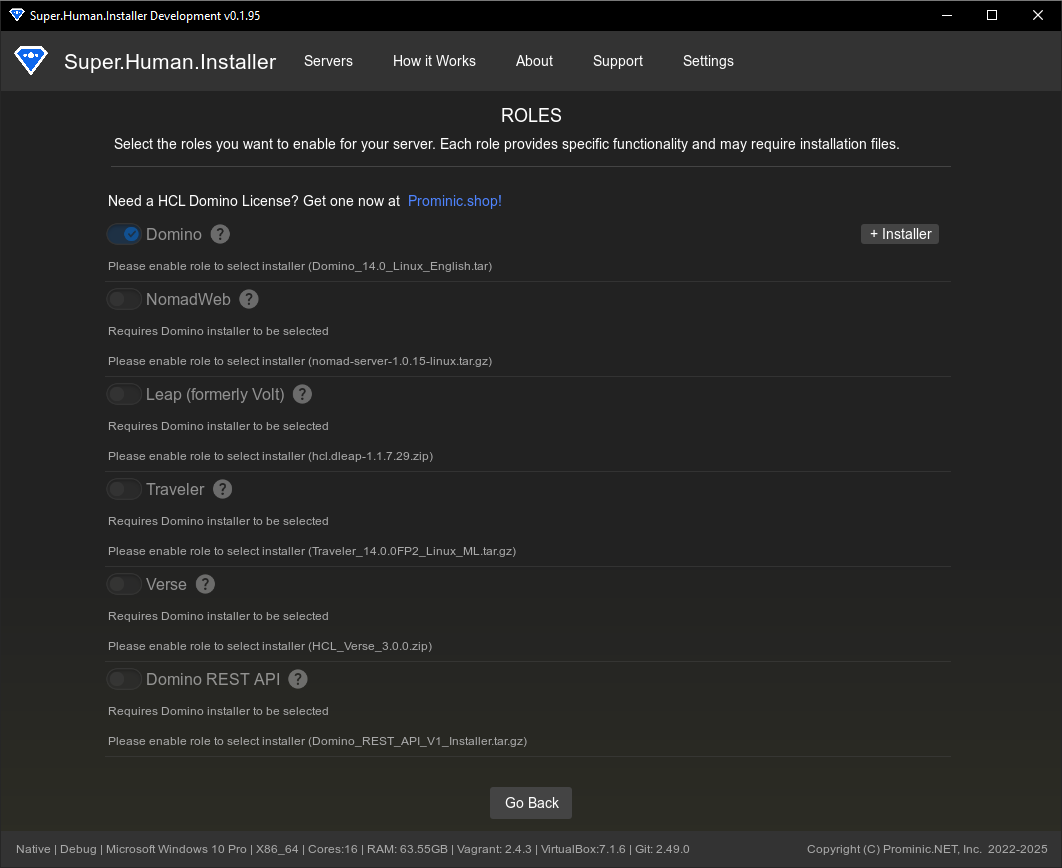
4. Configuring Roles (RolePage.hx)
- Click the “Configure Roles” button.
- This page lists all software roles defined by the selected provisioner (from its
provisioner.yml). - Enable/Disable Roles: Check the boxes next to the roles you want to install on this server. Some roles might be marked as required by the provisioner and cannot be disabled.
- Locate Installer Files: For roles that require specific installer files (as defined in the provisioner’s metadata), click the “Locate File…” button next to the role. Select the corresponding installer, fixpack, or hotfix file from your local machine. SHI will verify the file using its hash (if known) and associate it with the role for this server instance. Ensure required files are managed via the File Cache & Hashes manager.
- Click “Close” to return to the main configuration page. The “Configure Roles” button should now indicate if the role configuration is valid (e.g., required files located).
5. Advanced Configuration (Optional)
- Click the “Advanced Configuration” link.
- This opens the
AdvancedConfigPage.hx(for standard/additional) orDynamicAdvancedConfigPage.hx(for custom). - Networking:
- DHCP: Uncheck to manually configure IP settings.
- IP Address, Netmask, Gateway: Set static IP details if DHCP is disabled.
- DNS Servers: Configure primary and secondary DNS servers.
- Bridge Adapter: Select a specific host network interface for bridged networking, or leave as “None” / “Default”.
- Disable Bridge Adapter Promiscuous Mode: (Optional) Check if needed for specific network configurations.
- Resources:
- CPUs: Adjust the number of virtual CPU cores allocated to the VM.
- RAM (GB): Adjust the amount of memory allocated to the VM.
- Environment:
- Open Browser After Provision: Automatically open the server’s web address after successful provisioning.
- Setup Wait (seconds): Time SHI waits after VM boot before starting provisioning.
- Custom Fields: (Specific to Custom Provisioners) The
DynamicAdvancedConfigPagewill display input fields based on theadvancedFieldsdefined in the selected custom provisioner’sprovisioner.yml. - Click “Save” to apply advanced settings and return to the basic configuration page, or “Cancel” to discard changes.

6. Saving the Server
- Once basic configuration is complete, roles are configured, and any required ID files are located, click the “Save” button on the main configuration page.
- SHI performs final validation.
- The server configuration is saved to the main
.shi-configfile. - The server’s working directory is created on your host machine (
<AppStorage>/servers/<Type>/<ID>/). - Essential configuration files (
Hosts.yml) are generated based on your settings and the provisioner’s templates. - The server appears in the main “Servers” list with the status “Ready” or “Stopped”.
Your server is now configured and ready to be started and provisioned. See Server Management) for the next steps.
Relevant Files
- Source/superhuman/components/ServiceTypePage.hx - Service type selection interface.
- Source/superhuman/components/ConfigPage.hx - Standard server configuration UI.
- Source/superhuman/components/additionals/AdditionalServerPage.hx - Additional server configuration UI.
- Source/superhuman/components/DynamicConfigPage.hx - Custom provisioner configuration UI.
- Source/superhuman/components/RolePage.hx - Role selection interface.
- Source/superhuman/components/AdvancedConfigPage.hx - Advanced configuration UI.
- Source/superhuman/components/DynamicAdvancedConfigPage.hx - Custom provisioner advanced configuration UI.